How to Assemble Boltless (Rivet) Shelving: Steps and Mistakes
In this guide
Boltless shelving goes together in about the time the box claims, provided three things are right: the posts are the right way up (keyhole slots narrow end down), every beam goes in ledge-up on the inside, and every rivet is tapped fully down into the narrow end of its slot. Then the unit is leveled, anchored to the wall and loaded heavy-at-the-bottom. This guide follows the manufacturer manuals for rivet-style units, with Edsal’s UR-series instructions as the reference, and lists the assembly mistakes that cost load capacity. It is instruction-based: we cite the manuals, not our own build. Disclosure: As an Amazon Associate I earn from qualifying purchases. Some brands featured below pay a bonus commission through Amazon Creator Connections. See /disclosure/.
How a boltless joint works
A boltless (or “rivet”) unit has four kinds of part:
- Posts (uprights): angle or tube steel with a column of keyhole-shaped slots.
- Beams: the long horizontal members on the front and back, with a rivet near each end.
- Braces: the short horizontal members on the sides, also riveted.
- Decks: wire, steel, particleboard or laminated boards that sit on the beam ledges.
Each rivet drops into the wide, round part of a keyhole slot and is tapped down into the narrow part. Once there, weight on the shelf pushes the rivet deeper into the narrow end. That is why the joint holds without bolts, and why the two classic failures are a post installed upside down and a rivet left half-seated.
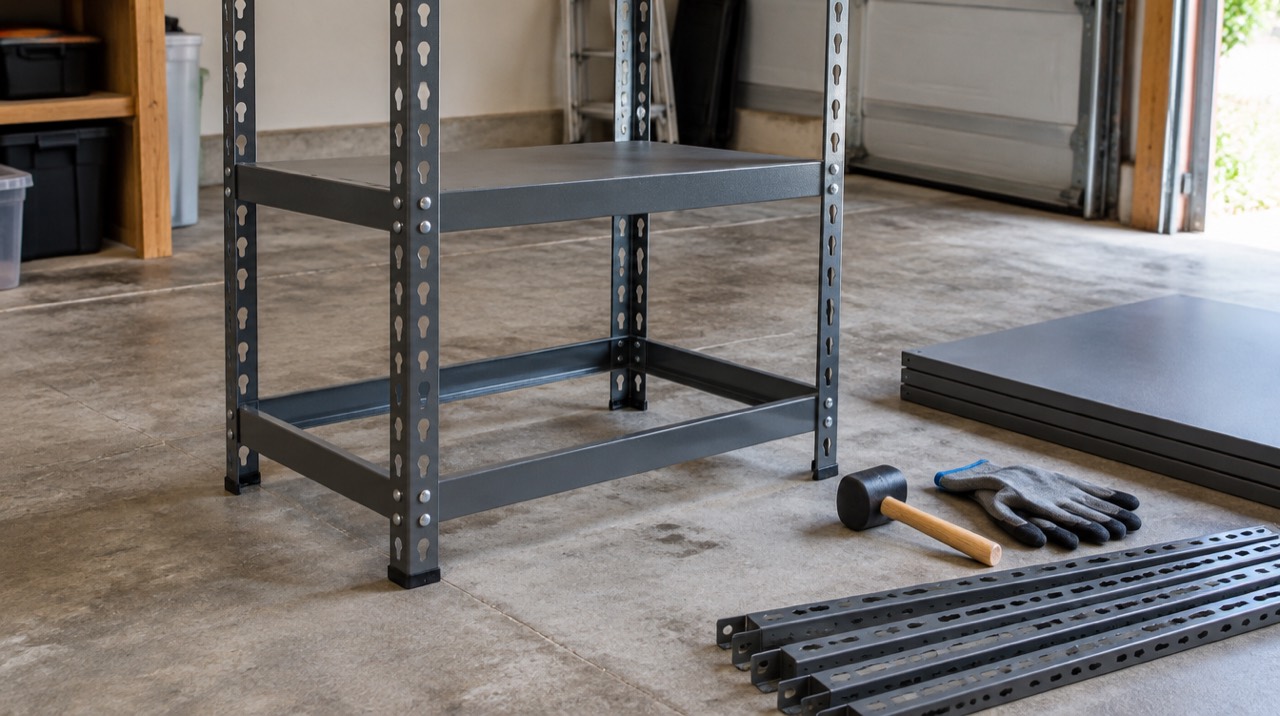
Edsal’s instructions describe the whole system in one paragraph: fit the two rivets of each brace and beam into the keyhole slots of the post, with the narrow end of the slots facing down, braces and beams installed with the ledge facing up on the inside, and a rubber mallet used to tap down on the top of each brace and beam so the rivets seat into the narrow end (Edsal UR-series assembly instructions, PDF).
Tools and prep
| Item | Why | Notes |
|---|---|---|
| Rubber mallet | Seats the rivets | Edsal lists it as not included; many Amazon units include one |
| Work gloves | Cut steel edges | Edsal: “wear gloves for protection” |
| Second person | Holds posts upright | Edsal: use two or more people to assemble and move |
| Level | Checks shelves and posts | Garage floors slope to the door |
| Tape measure | Spacing shelves for totes | 27-gallon totes are about 15.5 in tall |
| Drill, stud finder, anchor kit | Wall anchoring | Edsal: fasteners not included |
Before you start:
- Lay out and count parts against the parts list. Edsal’s 5-shelf kit is 8 posts (two halves per corner), 10 braces, 10 beams, 5 decks, 4 post connectors and 8 post caps. Missing parts are far easier to deal with before the frame is half built.
- Identify beams vs braces. Beams are the long front/back pieces; braces are the short side pieces. On a square unit they can look alike, so measure.
- Find the ledge. Each beam and brace has a lip that the deck sits on. It goes up and inside.
- Check slot orientation on every post: narrow end down. If the post halves have a top and bottom, the slot shape tells you which is which.
- Work near the final spot. A finished unit is heavy and awkward; REIBII’s 48.2-inch 5-tier lists an item weight of 72 lb, Lionhon’s 59-inch 4-tier 66.1 lb.
Step-by-step assembly
This is the sequence in Edsal’s manual, which matches most rivet-style units. Follow your own manual where it differs.
- Feet first. Fit the post caps or foot pads to the bottom of the four lower posts.
- Bottom shelf, short sides first. Install two braces between the posts at the lowest level. Edsal recommends using the second keyhole slot from the bottom for the bottom shelf, which keeps the bottom deck off the floor.
- Bottom shelf, long sides. Install two beams the same way. You now have a free-standing rectangle.
- Seat all eight rivets. Tap down on the top of each brace and beam near the post until the rivets sit in the narrow end of the slots. Tap, do not swing; the goal is to drive the rivet down, not to dent the beam.
- Square and level. Check the rectangle with a level before going higher. Adjust feet or shim now; it is much harder once the unit is loaded.
- Lay the deck onto the ledges. Wire decks usually drop in; particleboard sits on the ledge; some units add a center support bar under each deck.
- Middle shelves. Repeat braces, beams, seating and deck at each level, evenly spaced or set for your totes.
- Join the upper posts. Fit the post connectors to the tops of the lower posts, then set the upper posts onto them. Edsal says a mallet may be used to lightly tap the connector and the upper post into place.
- Upper shelves and caps. Finish the remaining shelves, then fit the top post caps.
Setting shelf heights for what you store
Plan openings before you build. A 27-gallon tote is about 15.5 inches tall (Sterilite), so give it about 17 inches of clear opening to slide in and out. REIBII’s 48.2-inch unit adjusts in 1.5-inch steps, REIBII’s 5,088 lb rack in 2.75-inch steps, and Lionhon’s 59-inch unit in 1.5-inch steps. Paint cans and small bins need much less, so a mixed unit often has two tall tote openings and two or three short ones. Our shelving depth for totes guide has the tote dimensions.
Building two short units instead of one tall one
Many 5-tier boltless units split into two shorter units. Edsal’s manual describes building two 36-inch-high units, one with three shelves and one with two, using all eight post caps and leaving out the post connectors. Several REIBII listings advertise the same split. Each short unit is a separate piece of furniture: level it and anchor it on its own.
After assembly: level, anchor, load
Level. Edsal states the unit should be placed on a level surface, and that failing to do so can cause poor performance or a safety hazard. A racked frame loads two posts more than the others. Our planned guide to garage shelving on an uneven floor covers shims and leveling feet.
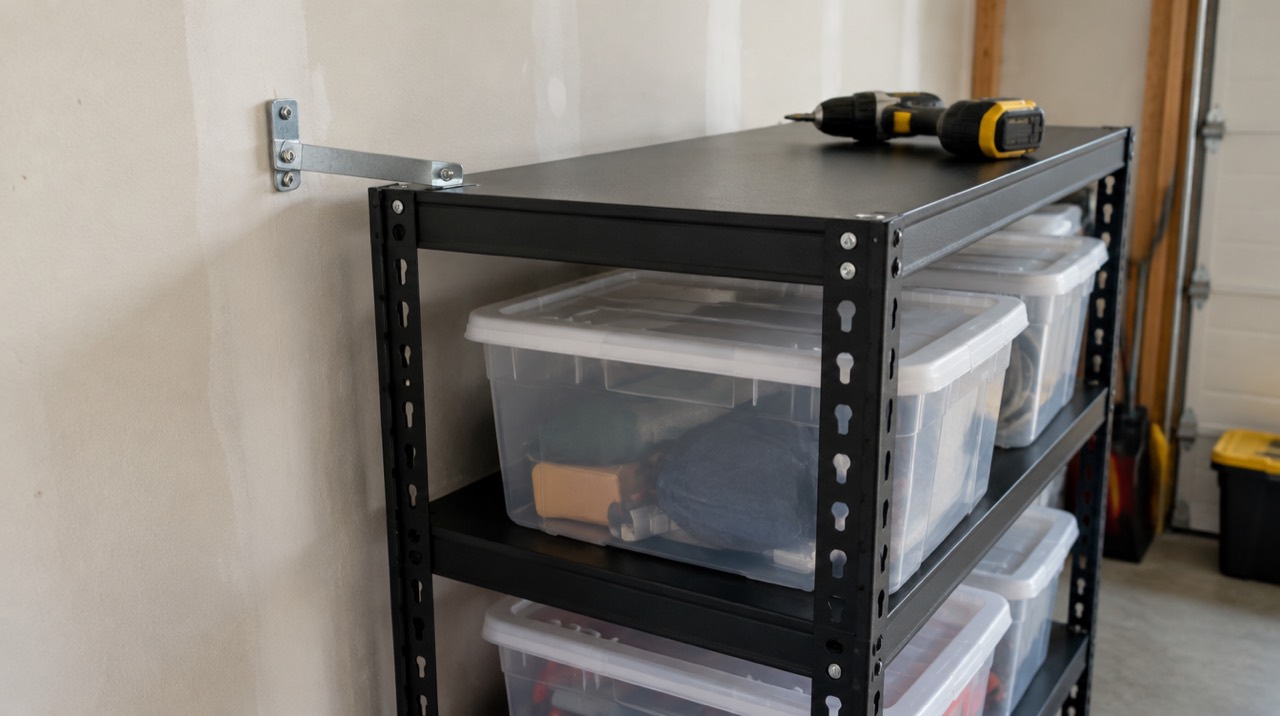
Anchor. Edsal’s manual says to always secure the unit to a wall to prevent tipping, with suitable fasteners that are not included, and the CPSC’s Anchor It campaign recommends anchoring furniture with shelves. Use a strap or bracket into a stud near the top of the unit. The hardware choices are in anchoring garage shelving to the wall.
Load. Spread weight across the whole deck, keep heavy items on the bottom shelves, and stay inside the per-shelf rating. Edsal’s UR-series units are rated 800 lb per shelf and 4,000 lb for the unit, evenly distributed. The total is the sum of the shelves, not extra capacity for one shelf; see reading heavy-duty load ratings.
Recheck. After the first full load, walk around and look at every rivet. Edsal tells owners to periodically inspect that brace and beam rivets are properly seated into the post slots.
Mistakes that cost capacity
| Mistake | What happens | Fix |
|---|---|---|
| Post upside down (wide end of keyhole down) | Rivets cannot seat; beam can lift out | Flip the post; narrow end down |
| Beam installed ledge-down or ledge-out | Deck has nothing to sit on, or sits loose | Ledge up, on the inside |
| Rivet not fully seated | Weak joint; beam can pop out when bumped from below | Tap down until it bottoms in the narrow end |
| Steel hammer instead of rubber mallet | Dented beams, chipped coating (rust starts there) | Rubber mallet only |
| Bottom shelf in the lowest slot on a wet floor | Deck wicks water; particleboard swells | Use the second slot up, as Edsal recommends |
| Not leveling on a sloped slab | Racked frame, uneven post loads | Shim or adjust feet before loading |
| Mixing beams and braces | Shelf does not fit, or deck hangs over | Measure: beams are the long pieces |
| Climbing the shelves | Overloads a beam at a point; tip-over risk | Edsal: do not climb, stand on or use as a ladder |
| Skipping the wall anchor | Tip-over when pulled | Anchor to a stud |
A beam that pops out when a shelf is bumped from below is the classic symptom of a rivet that was never fully seated (Home Depot reviewers of some Husky units describe pieces popping out during assembly). Some newer units, including Lionhon’s and REIBII’s heavier racks, add safety locking pins at the beam joints; if yours came with pins, install every one.
Units that make assembly easier
If you are still choosing a unit, a few features make the build simpler: a mallet and gloves in the box, one-piece uprights (no post connectors to align), and locking pins at the beam joints.

Check the current price of the REIBII 5088 lb 68.3-inch wire rack on Amazon.
$169.99Price as of November 18, 2026, 4:08 PM ET. Prices and availability are accurate as of the date/time indicated and are subject to change. Any price and availability information displayed on Amazon.com at the time of purchase will apply to the purchase of this product.

Check the current price of the Lionhon 4500 lb 4-tier garage shelving on Amazon.
$125.99Price as of November 18, 2026, 4:08 PM ET. Prices and availability are accurate as of the date/time indicated and are subject to change. Any price and availability information displayed on Amazon.com at the time of purchase will apply to the purchase of this product.
A head-to-head on published specs is in REIBII vs Lionhon garage shelving, and the wider field is in best garage shelving.
Taking it apart
Unload the unit completely, then work from the top shelf down. Remove the decks, then tap each beam upward from underneath, close to the post, so the rivets ride back up into the wide part of the slot. Tap both ends evenly; prying one end up bends the beam. Lift out the upper posts from the connectors last. Manuals generally do not describe disassembly, so this is the reverse of the documented assembly; check yours.
Bottom line
Boltless shelving is only as strong as its worst joint. Posts narrow-end-down, beams ledge-up inside, every rivet tapped home, the frame level, the unit anchored, and heavy loads on the bottom: that is the whole method, and it is what the manuals say. Then recheck the rivets after the first load and every so often after that.
Frequently asked questions
Which way do the keyhole slots go on boltless shelving?
Narrow end down. Edsal's assembly instructions for its UR-series units say the narrow end of the post's keyhole slots must face down, so the beam's rivets drop into the wide part and are tapped down into the narrow part, where the load wedges them tighter. If the posts are upside down the rivets cannot seat.
Do I need a rubber mallet to assemble boltless shelving?
Yes. The rivets are seated by tapping down on the top of each beam and brace. Edsal lists a rubber mallet and gloves as helpful tools not included; REIBII and Lionhon include a mallet and gloves with their main garage units. A steel hammer can dent beams and chip the coating, so use rubber.
How do I know a rivet is fully seated?
The rivet head sits at the bottom of the narrow part of the keyhole and the beam no longer lifts when you push up on it from below. Some makers describe hearing a click as it locks. Check all four corners of every shelf before loading, and recheck after the first load, because Edsal tells owners to periodically inspect that rivets are properly seated.
Can one person assemble boltless shelving?
Many listings say so, but manufacturers' manuals are more cautious: Edsal's says to use two or more people to assemble and move the unit. A second person holding the posts upright while you set the first beams makes the job faster and stops a half-built frame from falling.
How do you take apart boltless shelving?
Unload it, then tap each beam upward from underneath with the rubber mallet near the post so the rivets move from the narrow end back to the wide end of the slot, and lift the beam out. Work from the top shelf down, the reverse of assembly. Seated rivets can be tight, so tap evenly at both ends to avoid bending the beam.
Keep planning
- Anchor Garage Shelving to the Wall in 7 Steps
Anchor garage shelving near the top into a wood stud or masonry, not drywall alone, with a strap or bracket. See the 7 steps (about 20 minutes).
Updated Oct 2026 - Garage Ladder Storage: Wall Hooks, Ceiling Racks and Hoists
Garage ladder storage compared: wall hooks for frequent use, ceiling racks for rare use, pulley hoists for high ceilings, with weights, ratings and mounting.
Updated Oct 2026 - Mounting Garage Shelves on Concrete Block or Brick Walls
How to mount garage shelves on a concrete block or brick wall: hollow vs grouted block, Tapcon and sleeve anchor loads, ledger boards, and spec-based shelf picks.
Updated Oct 2026